


Sharon has 21+ years of experience as a qualified Emergency Care Nurse registered with the Australian Health Practitioner Regulation Agency (APHRA) and 12+ years as a First Aid Trainer.
She takes pride in FirstAidPro making first aid training available, comprehensive and affordable to everybody.
Imagine you’re at a busy shopping mall when suddenly, a stranger collapses next to you. In this critical moment, your knowledge of CPR steps could mean the difference between life and death.
You’ve heard about the importance of CPR steps, but do you truly understand why each one is essential? From evaluating the scene to performing chest compressions, every action you take plays a fundamental role in increasing the victim’s chances of survival.
Let’s explore how CPR steps work together to maintain necessary bodily functions and why mastering them could one day help you save a life.

Key Takeaways
• CPR steps maintain blood flow to vital organs, increasing survival chances during cardiac arrest.
• Proper chest compressions and rescue breaths oxygenate the blood, supporting brain function.
• Following CPR steps ensures a systematic approach, maximising effectiveness in high-stress situations.
• Correct CPR steps can buy time until professional medical help arrives.
• Proper airway management and breathing assessment are crucial for identifying and addressing life-threatening conditions.

Assess the Scene
Before rushing to perform CPR steps, quickly scan the area for potential dangers to yourself and the victim. Scene safety is paramount, as you can’t help anyone if you become a victim yourself. Look for environmental hazards such as traffic, fire, electrical wires, or unstable structures. If you’re near water, verify there’s no risk of drowning.
Once you’ve confirmed the scene is safe, approach the victim cautiously. Check for signs of consciousness by tapping their shoulder and asking loudly if they’re okay. If there’s no response, look for obvious signs of life like breathing or movement. Don’t move the victim unless they’re in immediate danger.
If you’re alone, shout for help. If others are present, designate someone to call emergency services while you begin the assessment. Remove any visible obstructions from the victim’s mouth or throat. Check for a pulse at the carotid artery in the neck. If there’s no pulse and no breathing, begin CPR steps immediately.
Check for Responsiveness

After ensuring the scene is safe, your next step is to check the victim for responsiveness.
Approach the person and gently tap their shoulders while speaking loudly, asking, ‘Are you okay?’ Look for signs of responsive behaviour such as movement, eye-opening, or verbal responses. If the victim reacts, they’re conscious but may still need medical attention. Stay with them and call for help if necessary.
If there’s no response, it’s essential to act quickly. Check for breathing by looking at the chest for rise and fall, listening for breath sounds, and feeling for air from the nose or mouth.
If you don’t detect normal breathing within 10 seconds, assume the person is in cardiac arrest. Immediately call for emergency services or ask someone nearby to do so. If you’re alone, use your phone to call for help and put it on speaker mode.
While waiting for professional help, begin the CPR steps if you’re trained. If not, the emergency dispatcher can guide you through the process.
Call Emergency Services

Once you’ve determined the person is unresponsive, immediately call your local emergency number (such as 000 in Australia). This step is vital in the CPR process, as it guarantees professional help is on the way. The importance of communication can’t be overstated in these critical moments.
When calling emergency services, provide clear and concise information:
- Your exact location, including street address and any landmarks
- A brief description of the emergency situation
- Any relevant details about the victim’s condition
Stay on the line with the dispatcher and follow their instructions. They may guide you through CPR steps or provide other life-saving advice until help arrives. The timing of response is essential, so don’t delay making this call.
If you’re alone, call for help before starting CPR steps. If others are present, designate someone to make the call while you begin chest compressions. Remember, modern smartphones often have emergency call features that can quickly connect you to local services. Familiarise yourself with these features in advance.
Open the Airway

With emergency services on their way, your next step is to open the victim’s airway. This essential airway management technique guarantees oxygen can reach the lungs and important organs.
Begin by placing the person on their back on a firm, flat surface. Kneel beside their shoulders and tilt their head back gently. Use one hand to lift the chin, while the other hand pushes down on the forehead. This head-tilt, chin-lift manoeuvre helps to align the airway and prepare for rescue breaths.
If you suspect an obstruction, check the mouth for any visible objects. Use a finger sweep to remove any foreign material, being careful not to push it further down the throat. For unconscious victims, the tongue can fall back and block the airway. The head-tilt, chin-lift position helps prevent this.
If the person is unresponsive but breathing, consider placing them in the recovery position to maintain an open airway. Remember, proper airway management is fundamental for effective CPR steps. By guaranteeing a clear passage for air, you’re setting the stage for the next significant steps in the resuscitation process.
Check for Breathing

After opening the airway, you’ll need to check for breathing.
Look for chest movements, listen carefully for breath sounds, and feel for airflow from the nose or mouth.
These three actions should be performed simultaneously and take no longer than 10 seconds to complete.
Observe Chest Movements
Look closely at the person’s chest to check for any signs of breathing. This chest assessment is essential in determining whether the individual needs CPR. Observe the chest area for about 10 seconds, focusing on any movement that might indicate breathing.
During your movement observation, pay attention to these key points:
- Rise and fall of the chest
- Sounds of breathing or gasping
- Air movement from the nose or mouth
If you don’t see any chest movements or hear breathing sounds, it’s likely the person isn’t breathing normally. Remember, occasional gasps aren’t considered normal breathing. In this case, you should prepare to start CPR steps immediately.
If you’re unsure about the chest movements, don’t delay. It’s better to start CPR steps when it’s not needed than to withhold it when it is. Your quick action can be the difference between life and death.
If you’ve determined that the person isn’t breathing normally, call for emergency help right away. While waiting for professional help to arrive, begin chest compressions to maintain blood flow to critical organs.
Listen for Breath Sounds
Listening for breath sounds is a crucial step in evaluating whether someone needs CPR. After checking for chest movements, you’ll want to listen carefully for any signs of breathing.
Place your ear close to the person’s mouth and nose, while keeping their airway open. In emergency situations, every second counts, so spend no more than 10 seconds on this step.
As you listen, you should also look for chest movements and feel for air coming from their mouth or nose. Normal breathing is regular, quiet, and effortless.
Gasping or irregular breaths aren’t considered normal breathing and may indicate the need for CPR. If you don’t hear or feel any breath sounds, or if the person is only gasping occasionally, they’re likely not breathing effectively.
Feel for Air Flow
While listening for breath sounds, you’ll also need to feel for air flow from the person’s mouth and nose. This step is essential in your breathing assessment and helps determine if there’s an airway obstruction. Place your cheek close to the person’s mouth and nose, ensuring you’re not blocking their airway.
As you perform this check, focus on these three key sensations:
- Warmth: Feel for warm air against your cheek.
- Movement: Look for chest rise and fall.
- Sound: Listen for any breath sounds.
This process should take no more than 10 seconds. If you don’t detect any air flow, it may indicate that the person isn’t breathing or has an airway obstruction. In such cases, you’ll need to start CPR immediately or clear the airway if possible.
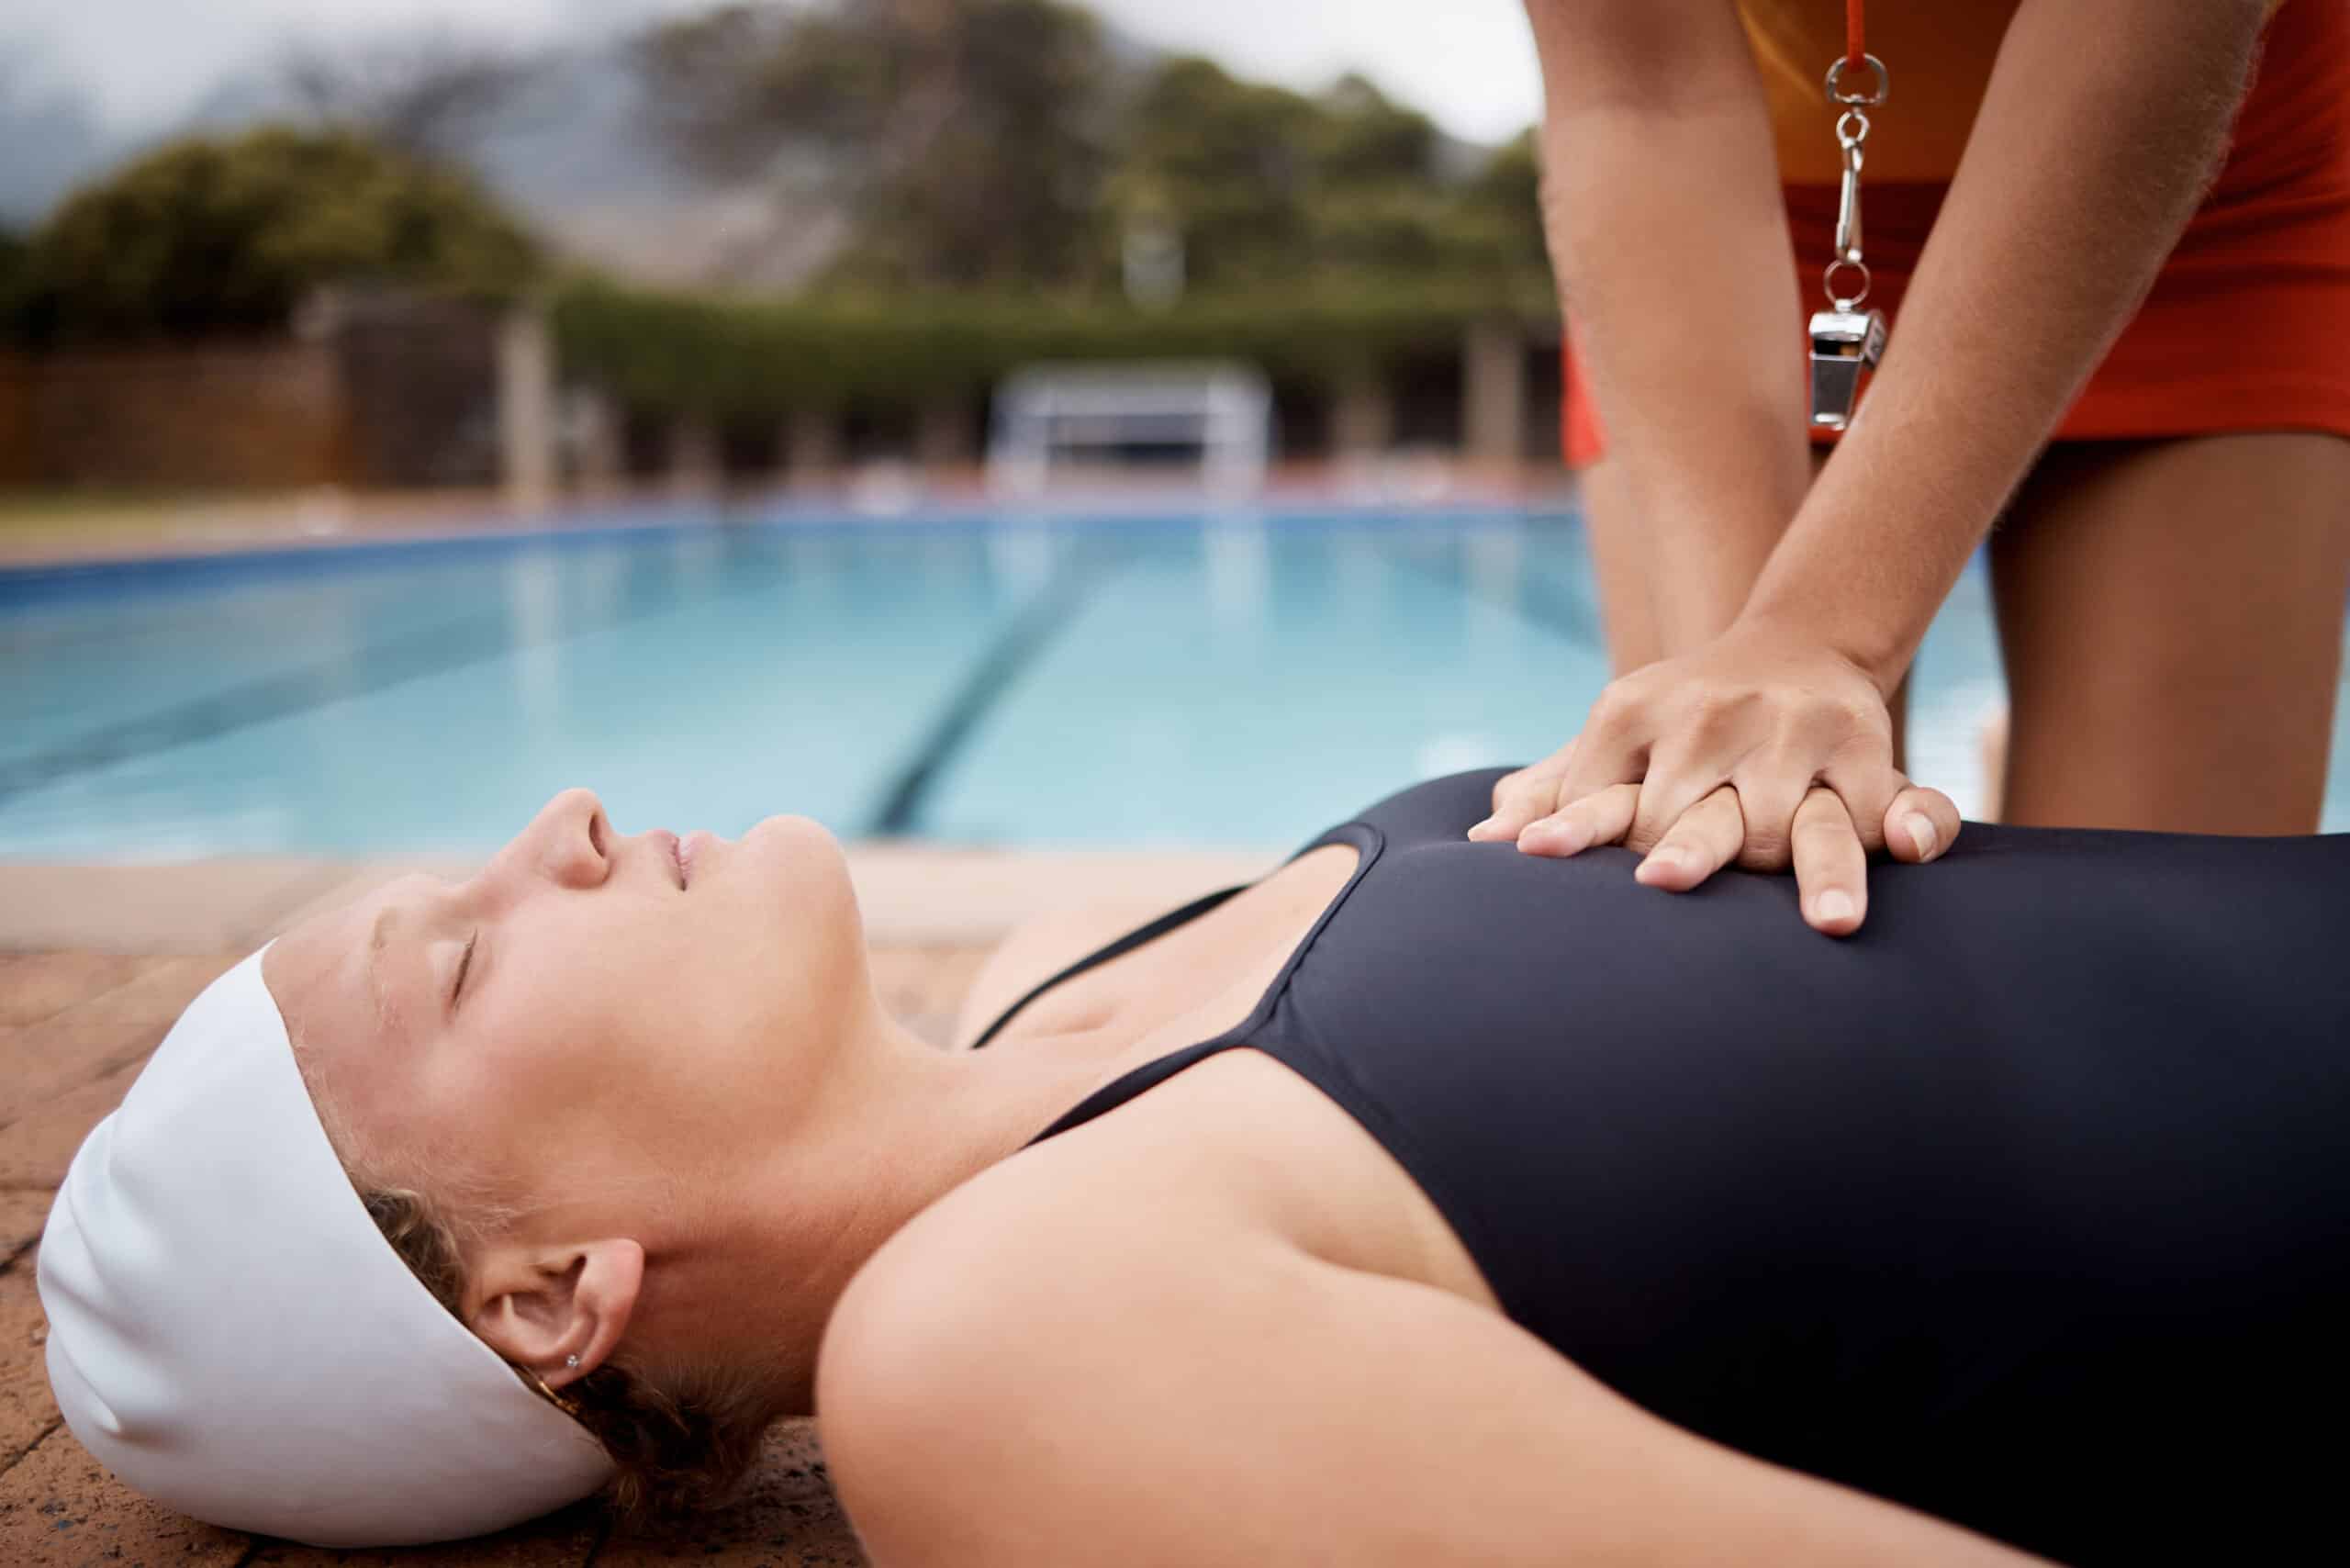
Begin Chest Compressions

Place your hands in the centre of the victim’s chest and begin forceful compressions at a rate of 100-120 per minute. Make sure you’re pushing hard and fast, maintaining a consistent rhythm.
The compression depth should be at least 5 cm (2 inches) for adults and children, and about 4 cm (1.5 inches) for infants. It’s essential to allow the chest to fully recoil between each compression.
The importance of maintaining the correct rhythm can’t be overstated. It’s helpful to count out loud or follow the beat of songs like ‘Stayin’ Alive’ by the Bee Gees, which has the right tempo for chest compressions.
Don’t stop compressions unless absolutely necessary, as continuous chest compressions are crucial for maintaining blood flow to important organs.
If you’re trained in rescue breaths, perform 30 compressions followed by two breaths. If you’re not trained or are uncomfortable giving breaths, continue with chest compressions only.
Provide Rescue Breaths
After chest compressions, you’ll need to provide rescue breaths to oxygenate the victim’s blood.
You can use either mouth-to-mouth or a protective mask for this step.
It’s essential to master the proper breathing technique to guarantee effective air delivery into the lungs.
Proper Breathing Technique
To provide rescue breaths, you’ll need to tilt the victim’s head back and lift their chin to open the airway. Pinch the person’s nose shut and create a seal over their mouth with yours. Give two rescue breaths, each lasting about one second, and watch for the chest to rise. If it doesn’t, reposition the head and try again.
Proper breathing technique is essential for effective rescue breaths. Here are key points to remember:
- Breathe normally, not forcefully. You’re providing oxygen, not inflating a balloon.
- Each breath should last about one second and cause the chest to visibly rise.
- Allow the chest to fall completely between breaths.
If you’re uncomfortable with mouth-to-mouth contact, use a barrier device like a face shield or pocket mask. These rescue techniques ensure you’re not putting yourself at risk while providing aid.
Mouth-To-Mouth Vs. Mask
When providing rescue breaths, you’ll need to choose between mouth-to-mouth resuscitation and using a barrier device like a face mask.
Mouth-to-mouth benefits include immediate availability and simplicity. It doesn’t require any equipment, making it ideal for unexpected emergencies. However, it carries a risk of disease transmission and may deter some rescuers due to hygiene concerns.
Mask advantages include creating a barrier between you and the victim, reducing the risk of infection. They’re designed to fit securely over the nose and mouth, ensuring more effective air delivery. Many masks come with one-way valves, preventing backflow of air or fluids. They’re also more hygienic, which may increase bystanders’ willingness to perform CPR.
To use a mask, place it over the victim’s mouth and nose, ensuring a tight seal. Tilt the head back to open the airway. Give two rescue breaths, watching for chest rise.
If using mouth-to-mouth, pinch the nose closed, create a seal with your mouth over theirs, and blow steadily for about one second per breath. Regardless of method, always prioritise high-quality chest compressions between breaths.
Continue CPR Cycle
Continue the CPR cycle by repeating chest compressions and rescue breaths until help arrives or the person starts breathing normally. This consistent application of CPR techniques is essential for maintaining blood flow and oxygen supply to important organs.
As you perform emergency response, remember to:
- Maintain a steady rhythm of 100-120 compressions per minute
- Allow the chest to fully recoil between compressions
- Minimise interruptions in chest compressions
Keep alternating between 30 chest compressions and 2 rescue breaths. If you’re unable or unwilling to give rescue breaths, focus solely on chest compressions. Don’t stop CPR unless you’re exhausted, the scene becomes unsafe, or professional help takes over.
Monitor the person for signs of breathing or movement. If they start breathing normally, place them in the recovery position and continue to monitor their condition. Be prepared to resume CPR if needed.
Remember, your efforts can greatly increase the chances of survival until professional medical help arrives. Stay calm and focused, as your actions during these critical moments can make a life-saving difference.
If possible, ask someone nearby to call for emergency services and locate an AED.
Use an AED
If an Automated External Defibrillator (AED) becomes available during CPR, you should use it immediately.
Apply the AED pads to the victim’s bare chest as directed by the device’s instructions, typically placing one pad on the upper right chest and the other on the lower left side.
Once the pads are in place, follow the AED’s voice prompts, which will guide you through analysing the heart rhythm and delivering a shock if necessary.
When to Use AED
An Automated External Defibrillator (AED) should be used immediately after discovering an unresponsive person who isn’t breathing normally.
Don’t delay in applying the AED, as every second counts in cardiac emergencies. If you’re alone, start CPR first, then use the AED as soon as it’s available.
AEDs are designed for use by both trained professionals and laypeople. However, AED training can greatly improve your confidence and effectiveness in an emergency. During training, you’ll learn:
- How to recognise cardiac arrest
- Proper AED pad placement
- When to deliver shocks and resume CPR
You’ll find AEDs in many public spaces, including airports, shopping centres, and sports facilities.
They’re user-friendly and provide voice prompts to guide you through the process. Remember, AEDs won’t deliver a shock unless it’s necessary.
Regular AED maintenance is essential to guarantee it’s ready when needed.
Check the battery and pads regularly, and replace them as recommended by the manufacturer.
Keep the AED in an easily accessible location and make sure others know where it’s stored.
Proper AED Application Technique
Proper AED application involves a series of essential steps that you must follow quickly and accurately to maximise the device’s effectiveness.
First, turn on the AED and follow its voice prompts. Remove any clothing covering the patient’s chest, and if necessary, quickly dry the skin. Open the AED pads and place them on the patient’s bare chest according to the diagram on the pads. One pad goes on the upper right chest, while the other goes on the lower left side.
Ensure that no one is touching the patient when the AED analyses the heart rhythm. If a shock is advised, make sure everyone stands clear of the patient. Press the ‘shock’ button when prompted.
After the shock, or if no shock is advised, immediately resume CPR for two minutes before allowing the AED to reanalyse.
Monitor Vital Signs
Regularly check the victim’s pulse and breathing to assess their condition during CPR.
Monitoring essential signs is imperative to determine the effectiveness of your resuscitation efforts and to detect any changes in the patient’s status. Use proper monitoring techniques to guarantee accurate readings and make informed decisions about continuing or modifying your CPR approach.
To effectively monitor essential signs during CPR:
- Check for a pulse every two minutes at the carotid artery in the neck.
- Observe chest rise and fall to assess breathing.
- Look for signs of circulation, such as skin colour changes or movement.
Recovery Position
Once you’ve successfully revived the victim and they’re breathing on their own, it’s crucial to place them into the recovery position. This positioning is one of the most important recovery techniques you can employ to guarantee the victim’s safety while waiting for emergency services to arrive.
To place someone in the recovery position, start by kneeling beside them. Extend their arm closest to you at a right angle to their body. Place their other hand across their chest, holding the back of their hand against their cheek. Bend their far knee up, then roll them onto their side by pulling on the bent knee. Adjust their top leg so both the hip and knee are bent at right angles. Tilt their head back slightly to keep the airway open.
The recovery position offers several recovery benefits. It helps maintain an open airway, prevents choking on vomit or fluids, and reduces the risk of aspiration. It’s also a stable position that allows you to monitor the victim’s breathing easily. Remember to keep checking their breathing and be prepared to start the CPR steps again if necessary.
Handover to Medical Professionals
When emergency medical services arrive, you’ll need to provide them with a clear and concise report of the situation and your actions. This handover is essential for medical team integration and ensuring the best possible care for the patient.
Be prepared to share the following information:
- The patient’s condition when you found them.
- Any changes in their status during your care.
- The specific actions you’ve taken, including CPR duration.
As you brief the medical professionals, follow the transfer protocol. Step aside to allow them access to the patient, but remain nearby in case they need additional information.
If you’ve used an AED, inform them and leave the device connected unless instructed otherwise.
Remember, your role is shifting from primary caregiver to support. Answer any questions the medical team may have about the incident or your interventions. If you’ve documented any essential signs or observations, share this information as well.
Once the handover is complete, the emergency medical team will take charge of the patient’s care. They may ask you to assist or provide further details, so stay available until they release you from the scene.