




Applicable to:
Construction
Warehousing

Kids CPR

CPR Kids​ Step-By-Step Guide

A complete CPR kids technique walkthrough for children aged 1 to puberty. Every step explained in detail, including exactly what to do, how to do it and why it matters. Ready to put theory into practise? Enrol in one of our courses and learn CPR and first aid for kids & infants.

Age range: 1 year old to onset of puberty

11

Steps to follow

Step 1 of 11

Kids DRSABCD: Follow every step in order

Do not skip ahead. Each step prepares for the next. In a real emergency, muscle memory from practice is what keeps the sequence on track.

Before You Start

Steps 1 to 3

Danger

Check for Danger

Your safety comes first. Before you go near the child, scan the entire scene for hazards. A rescuer who becomes a second victim helps no one.
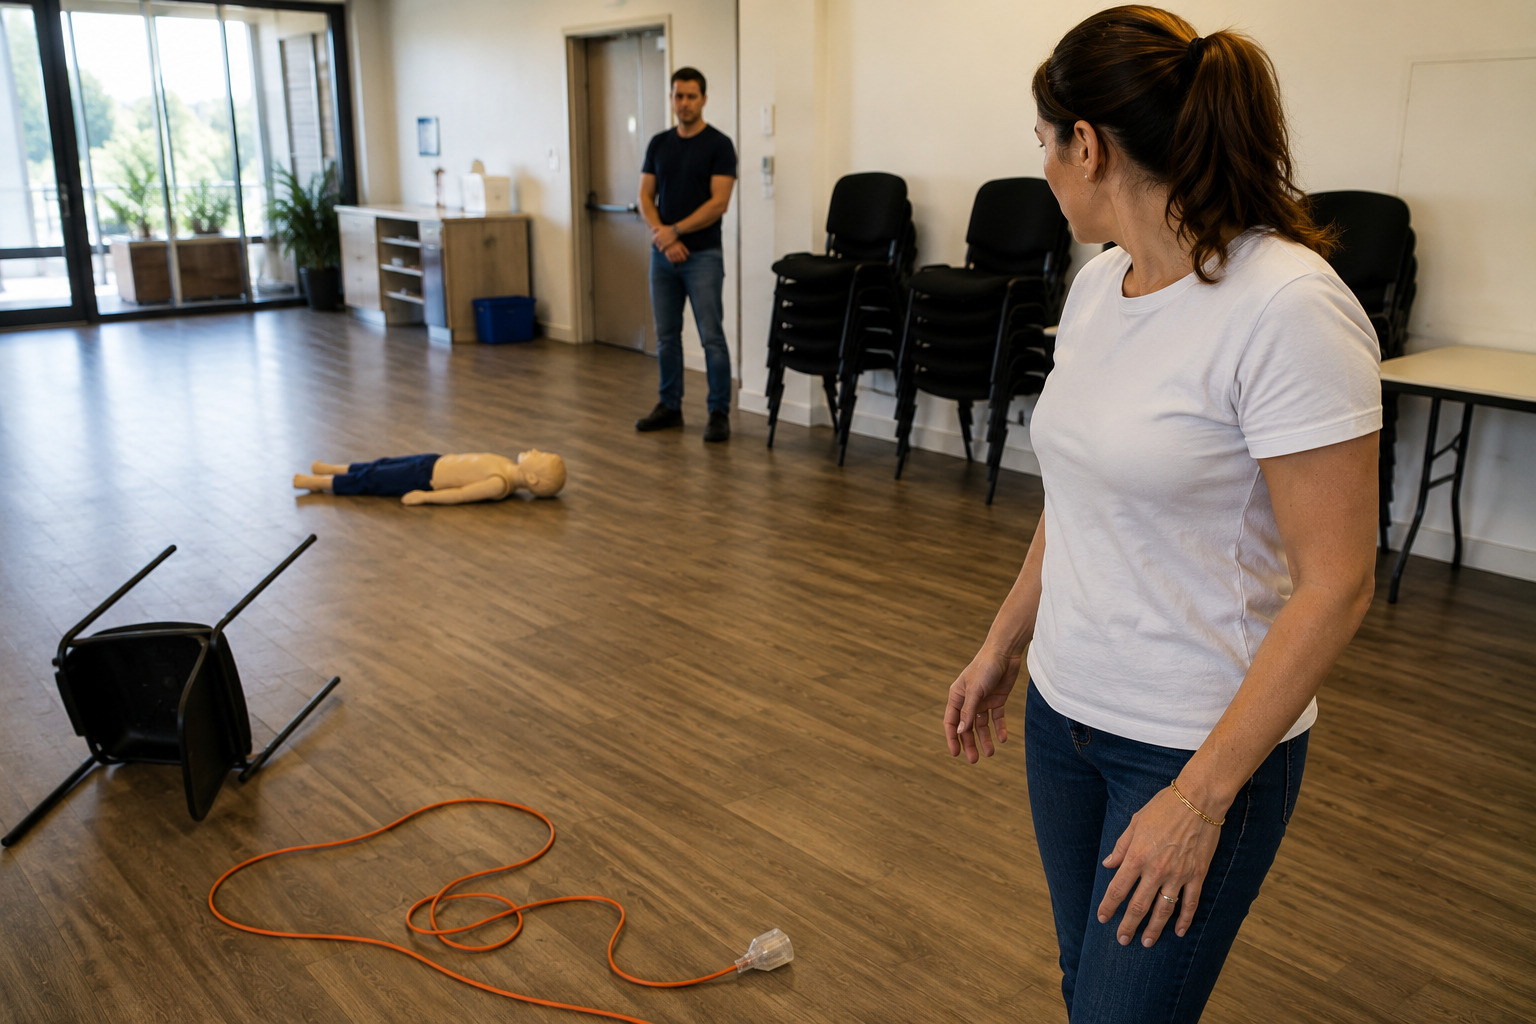
Stop at a distance first. Resist the urge to rush straight in. Take two seconds to look around the whole area before you move.
Look for hazards: traffic, water, electricity, unstable structures, fire, fumes, or whatever caused the child to collapse.
If the scene is safe: approach immediately and continue to Step 2.
If the scene is dangerous: call 000 and wait for emergency services who have the equipment and training to enter safely. Only approach once it is safe to do so.
If you can safely remove the hazard or move the child away from it, do so, then continue.
CPR Kids DRSABCD steps

Response

Check for Response

Kneel beside the child and confirm they are genuinely unresponsive before starting CPR.
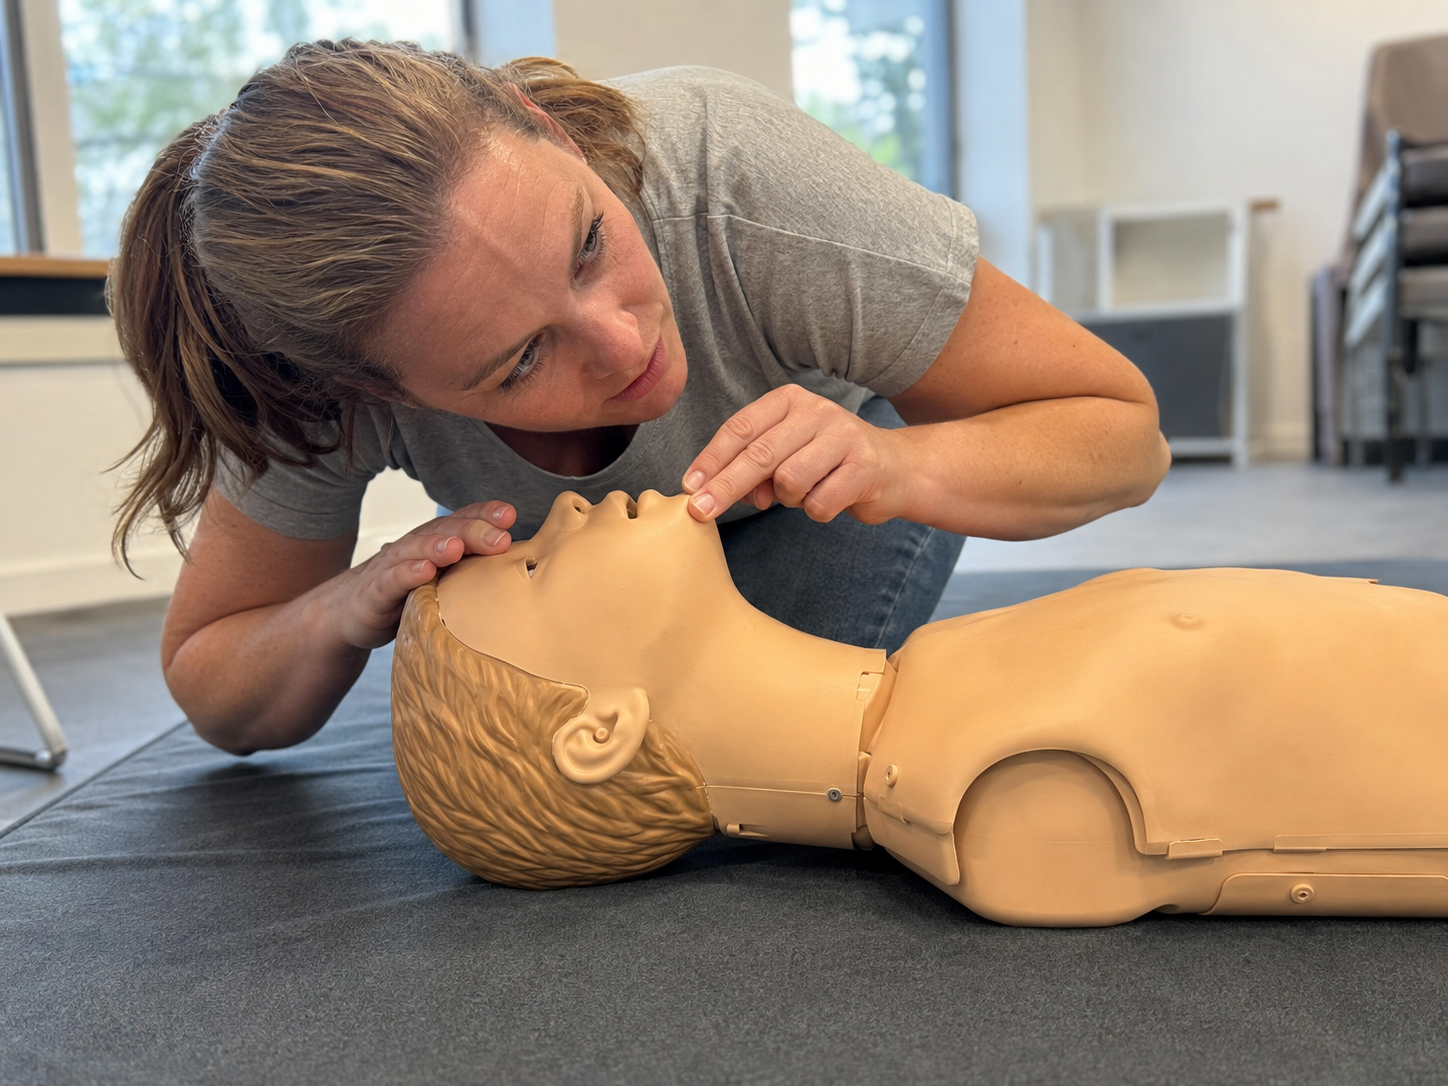
Kneel beside the child at shoulder level. Place them on their back on a firm flat surface if they are not already.
Tap both shoulders firmly. Use a deliberate tap, not a gentle touch. This is the correct check for children aged 1 and above. For infants under 12 months, you tap the bottom of the foot instead.
Call their name loudly and shout: "Can you hear me? Are you okay?" Speak directly toward their face.
Watch for any movement: eyes opening, a response to your voice, or any purposeful movement. Even a groan counts as a response.
If there is a response: keep the child still, monitor them, and call 000 for assessment. Do not leave them alone.
If there is no response: shout for help and immediately continue to Step 3.
CPR Kids guide

Call For Help

Send for Help

Get emergency services activated as fast as possible. How you do this depends on whether you are alone.
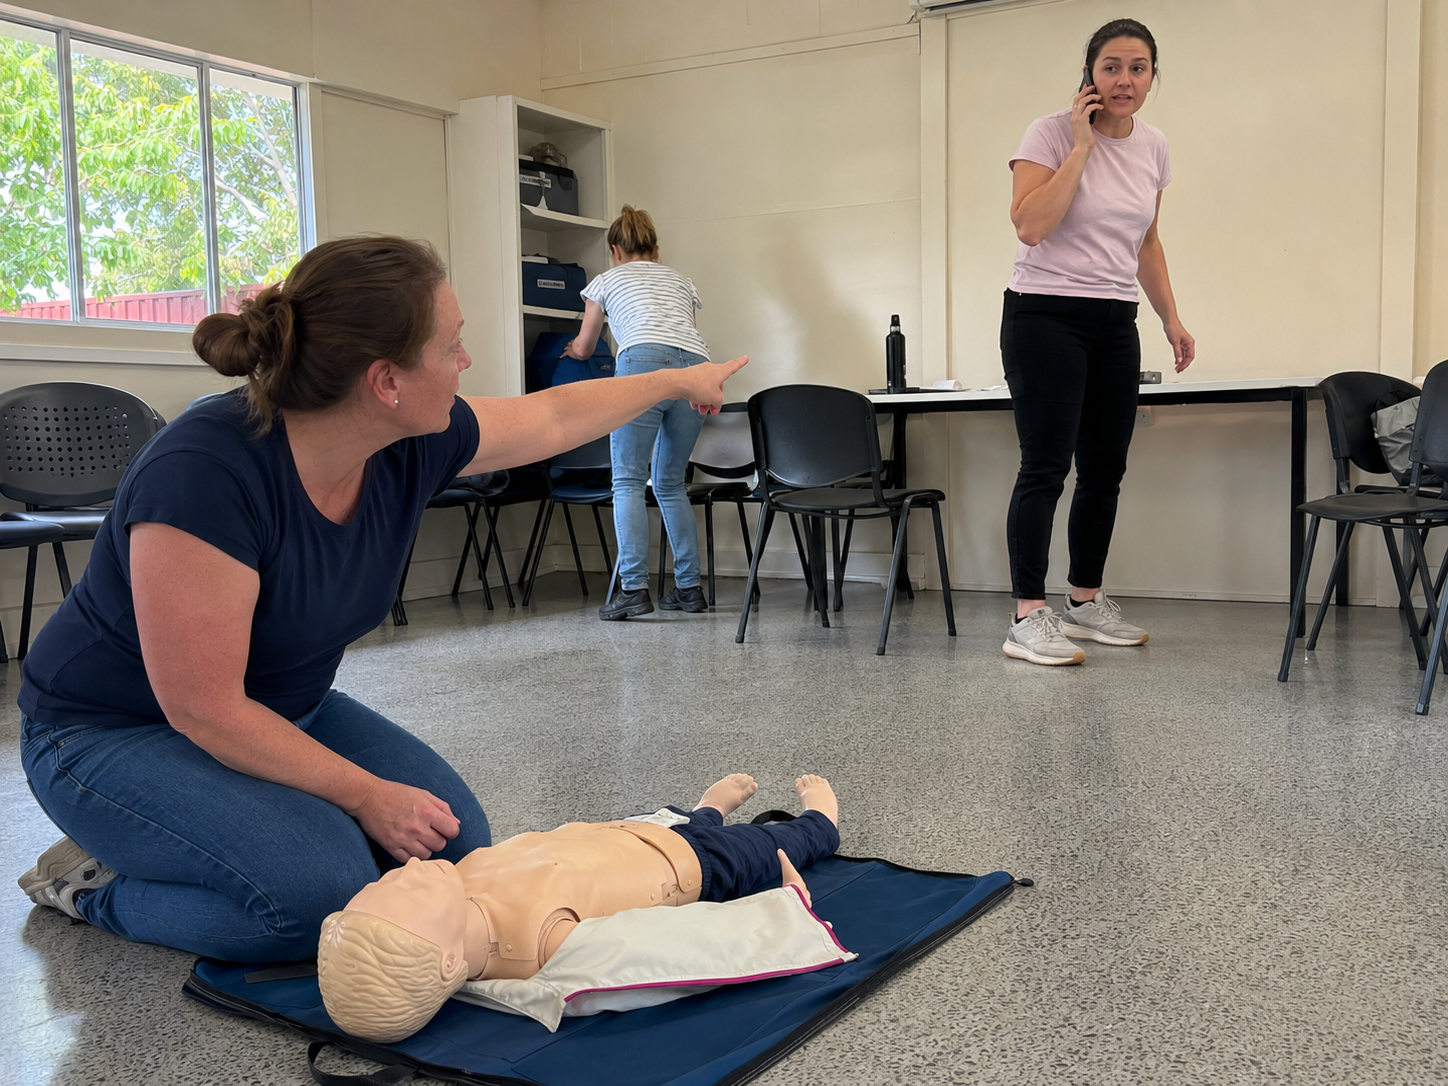
Shout for help as loud as you can. If others are nearby, someone may come to assist.
If a bystander is present: point directly at one person and say clearly: "You, call triple zero now. Tell them a child is not breathing." Giving the task to a specific person prevents the bystander effect where everyone assumes someone else is calling.
If you are completely alone: do not call 000 first. Give 1 full minute of CPR before stopping to call. This differs from adult CPR. Children's arrests are almost always caused by lack of oxygen, so delivering CPR immediately is the priority.
When calling 000: put the phone on speaker, place it nearby, and continue CPR. Tell the operator the child's approximate age, your location, and that the child is unresponsive and not breathing. Follow their instructions.
CPR for kids - First Aid Pro
Airway & Breathing

Steps 4 to 6

Breathing check

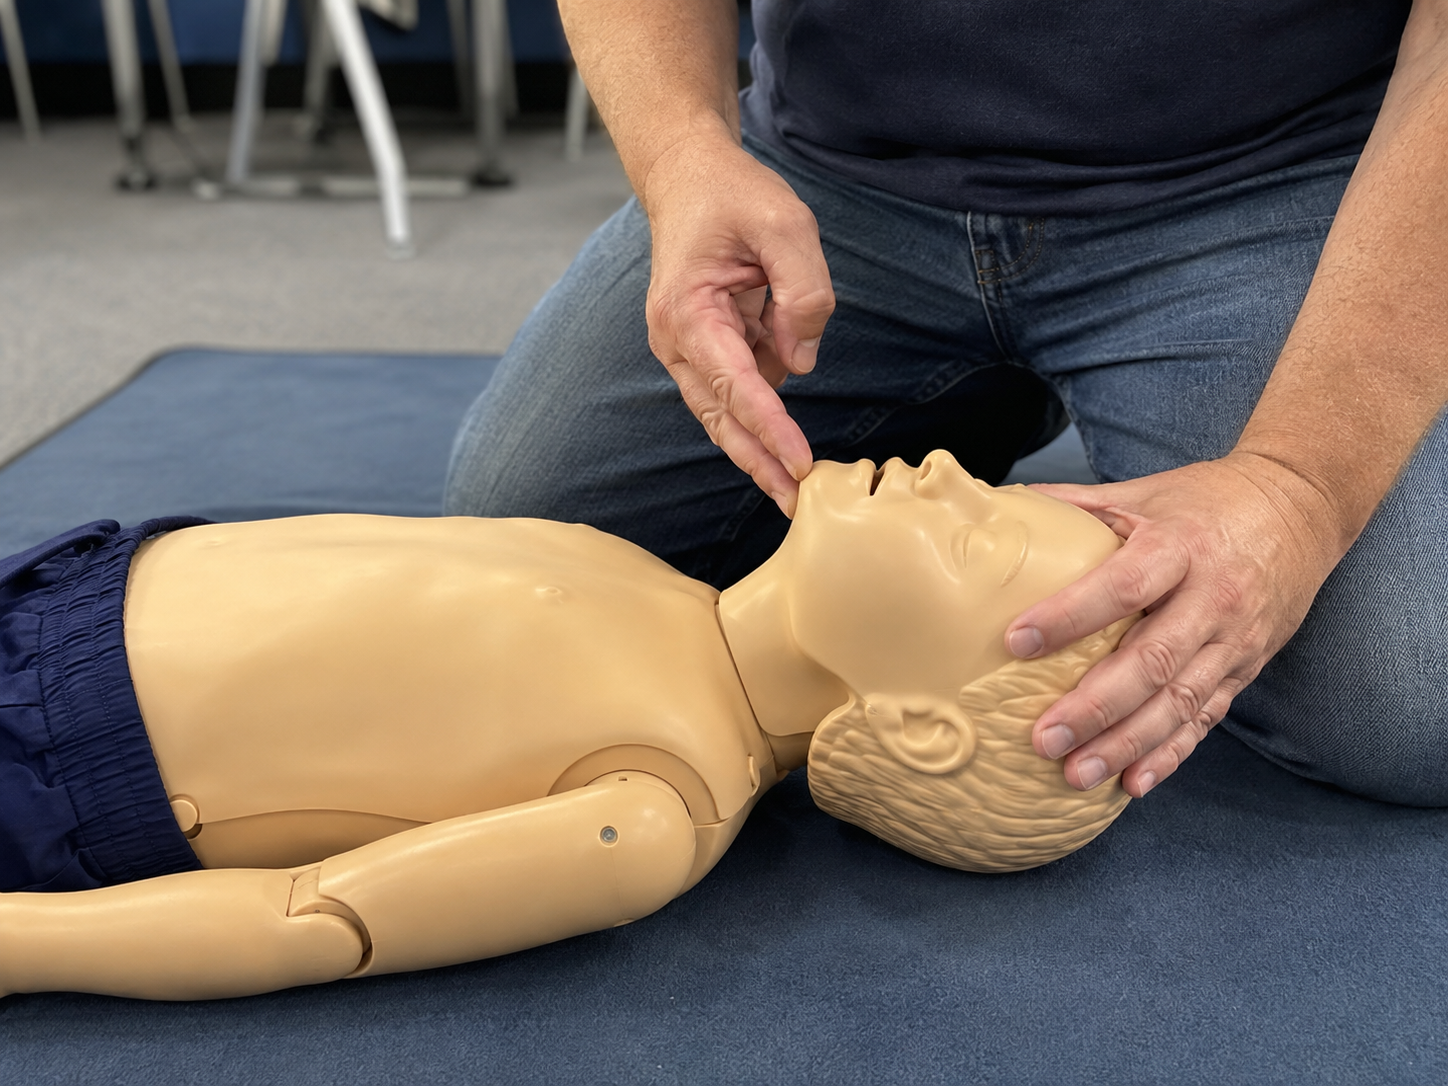
Check the Airway

An unconscious child’s tongue can fall back and block the airway. A correct head position lifts the tongue clear. The angle matters: not the same as an adult, not the same as an infant.
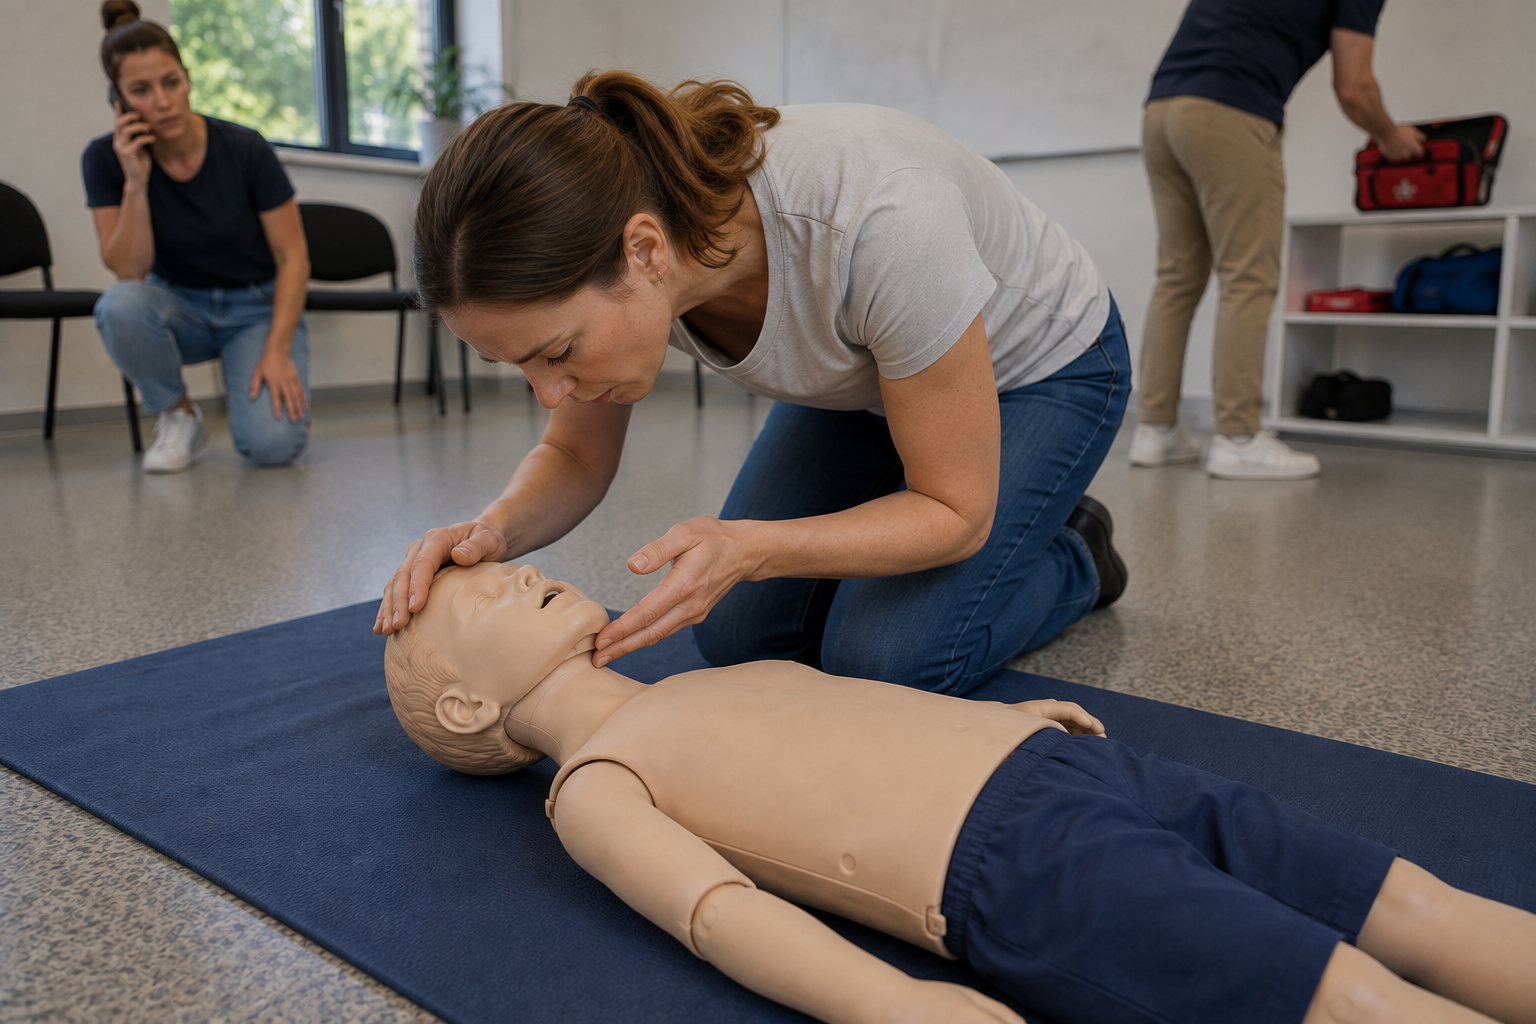
Make sure the child is on their back on a firm, flat surface. The ground is ideal — a soft mattress makes compressions less effective.
Place one hand on the child's forehead, palm flat and stable.
Place two fingertips of your other hand under the bony part of the chin. Not the soft fleshy part underneath, which can compress the airway. Your fingertips should be on the jawbone.
Gently tilt the head back with slight extension. Press softly on the forehead and lift the chin upward at the same time. More tilt than neutral (infant position), but less than the full chin-to-ceiling tilt used for adults.
The airway is now open. Keep this position throughout rescue breathing. If you lose it, the breaths will not reach the lungs.
Look inside the mouth for any obvious obstruction you can see. If visible and easy to grasp, remove it with your fingers. Do not perform blind finger sweeps inside the mouth.
CPR Kids guide - First Aid Pro
Slight extension only. A child's airway is narrower and more flexible than an adult's. Over-tilting the head can cause the soft trachea to kink and block rather than open.

Airway

Open the Airway

An unconscious child’s tongue can fall back and block the airway. A correct head position lifts the tongue clear. The angle matters: not the same as an adult, not the same as an infant.
Maintain the head tilt and chin lift from Step 4 throughout this check.
Look: watch the child's chest for rise and fall.
Listen: turn your ear toward their mouth and nose and listen for the sound of breathing.
Feel: sense the warmth or movement of breath against your cheek.
Do this for no more than 10 seconds. Count silently: "one thousand, two thousand" up to ten.
If breathing normally: place the child in the recovery position on their side, monitor them, and wait for emergency services.
If not breathing normally, or if you are unsure: move immediately to Step 6 and start rescue breaths now.
CPR Kids guide - check airway
Occasional gasping is not normal breathing. A child in cardiac arrest may gasp or make irregular sounds. This is agonal breathing and it is a sign of cardiac arrest, not recovery. Treat it as not breathing and begin CPR immediately.

Breathing

Give 5 Initial Rescue Breaths

Before any chest compressions, deliver 5 rescue breaths. Children almost always arrest because of oxygen deprivation. Getting oxygen into the bloodstream immediately is the single most important thing you can do. This is one of the most significant differences from adult CPR, where compressions come first.
Maintain the head tilt and chin lift from Step 4. If you have lost the position, re-establish it now.
Pinch the nose shut with your thumb and index finger, using the hand on the forehead. Pinch the soft part of the nose, not the bony bridge.
Open the child's mouth slightly by keeping the chin lift in place.
Take a normal breath in, not a deep one. You are not trying to fill the child's lungs with a full adult breath.
Place your mouth over the child's mouth and form a complete airtight seal. Your lips should wrap fully around theirs with no gaps at the sides.
Breathe in gently and steadily over approximately 1 second. Use enough air to make the chest visibly rise, but no more. Blowing too hard pushes air into the stomach, which causes vomiting and reduces the effectiveness of ventilation.
Watch for chest rise as you breathe in. The chest rising tells you the air is reaching the lungs.
Remove your mouth and allow the chest to fall completely before the next breath. Watch the chest fall — this passive exhalation must complete before you breathe in again.
Repeat until you have given 5 breaths. Each breath: pinch, seal, breathe in 1 second, watch rise, remove, watch fall.
Child CPR
If the chest does not rise: re-check head position and the seal around the mouth before the second attempt. A head not tilted enough, or a gap in the seal, are the most common reasons breaths fail to enter. Attempt up to 5 times in total, then proceed to compressions regardless
Chest Compressions

Steps 7 to 8

Correct Hand Position For Kids CPR

Start CPR

Correct hand placement ensures compressions go deep enough to circulate blood. Take a moment to find the right position – it stays the same for every compression.
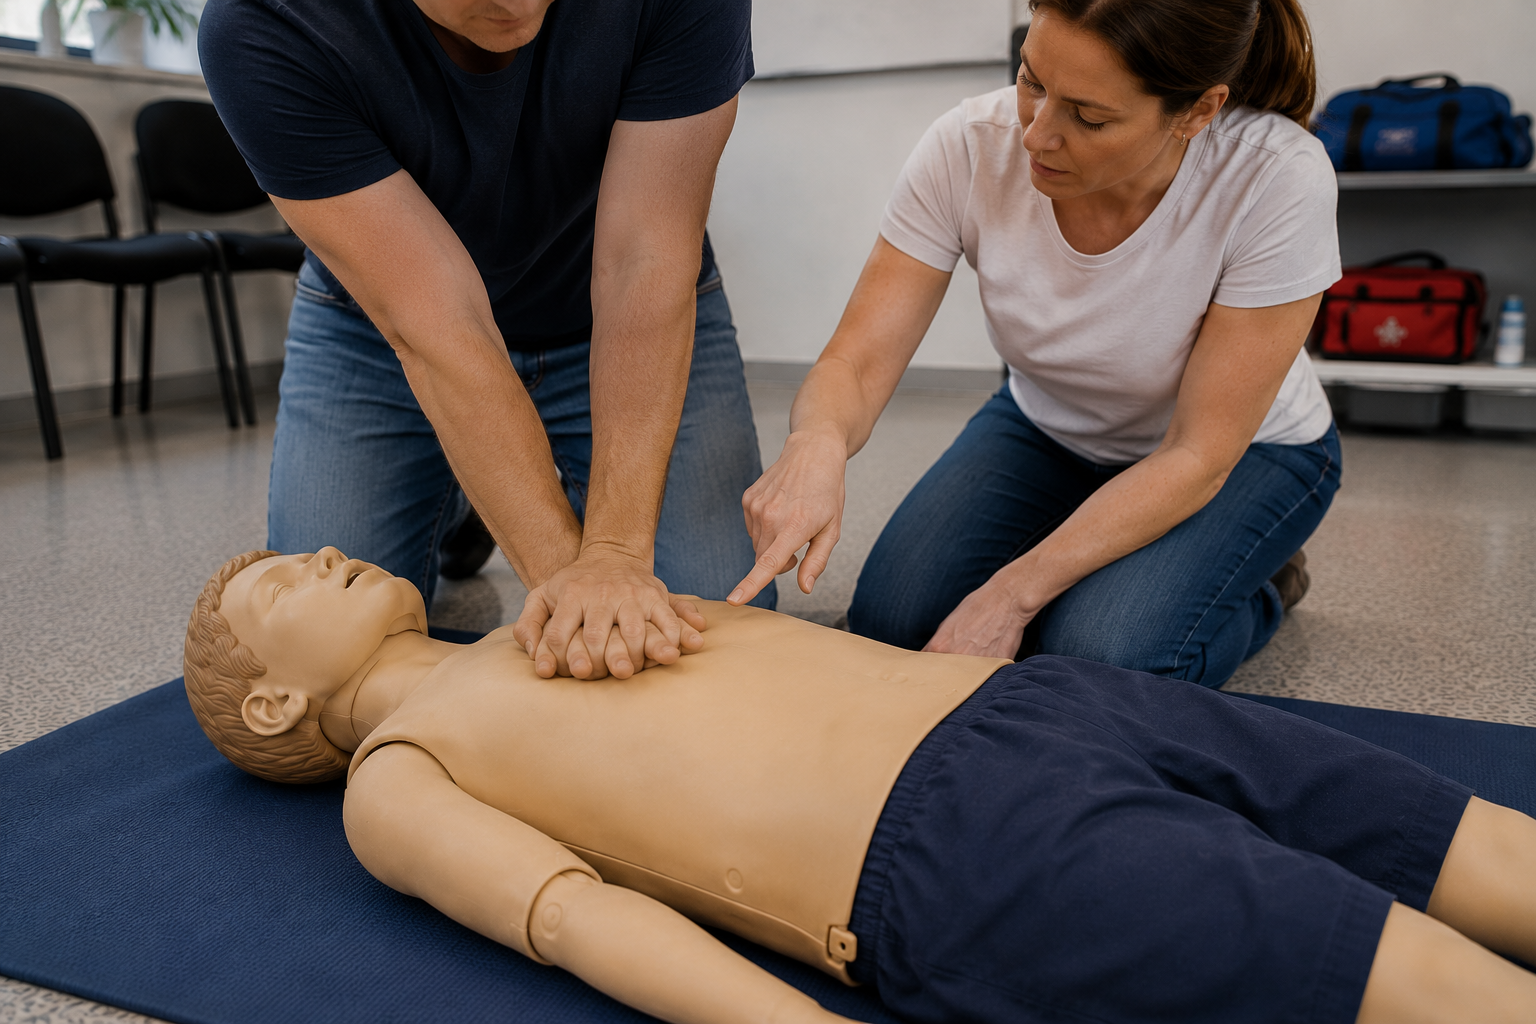
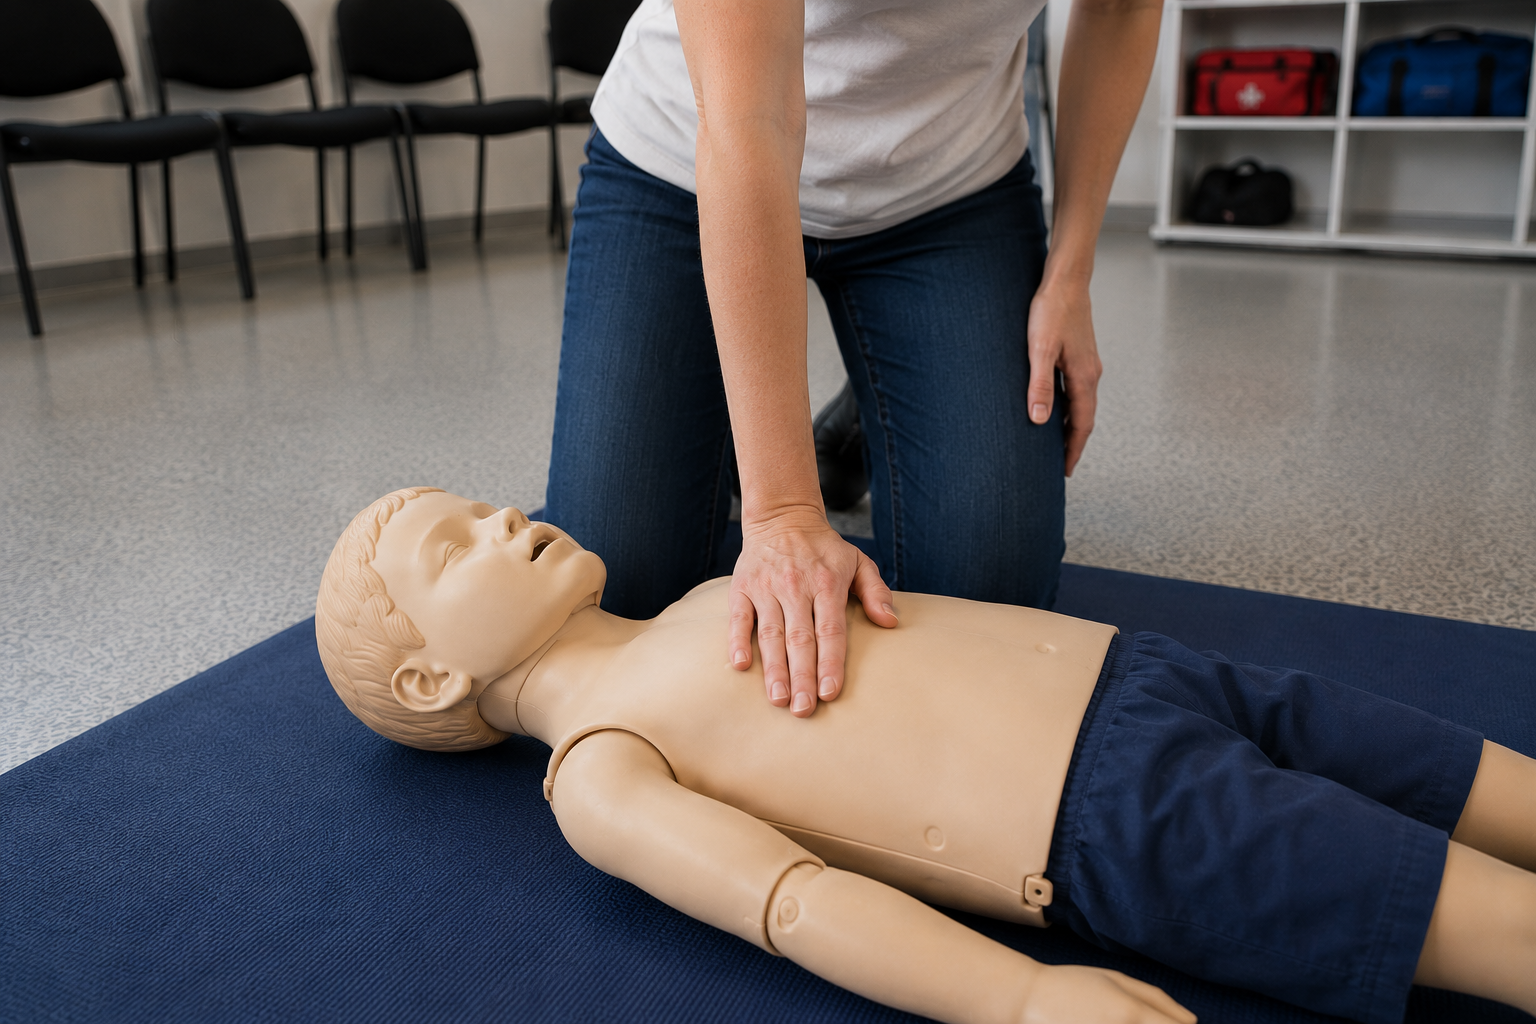
Locate the centre of the child's chest. The sternum (breastbone) runs down the middle. You want the lower half of this bone, above where it meets the soft tip at the very bottom (the xiphoid process). Avoid that soft tip.
Place the heel of your dominant hand on that spot. The heel is the firm, bony part at the base of your palm, not the fingertips or the flat of your hand.
Raise your fingers off the chest. Only the heel of your hand should be in contact. Fingers resting on the ribs can cause fractures and reduce compression efficiency.
For a larger or older child close to puberty: place your second hand on top of the first, interlocking fingers, as you would for an adult. Use whichever technique achieves sufficient depth for the size of the child.
Straighten your arm completely. Position your shoulder directly above your hand so that body weight (not arm strength) does the work. A bent arm tires quickly and delivers inconsistent depth.
Steps to follow for Kids CPR

30 compressions

Perform 30 Chest Compressions

Chest compressions physically pump blood around the body when the heart has stopped. Depth, rate, and recoil all matter. Shallow compressions do not circulate enough blood to keep the brain alive.

~5 cm

Depth

100–120

Per minute

30

Before breaths

Full

Recoil
Press straight down using your body weight through the straight arm. Do not push with your arm muscles. Lean your weight forward into each compression.
Compress to approximately 5 cm deep, at least one third of the front-to-back depth of the child's chest. This may feel deeper than expected. Commit to it. Shallow compressions are the most common CPR error.
Release completely after each compression. Allow the chest to spring fully back up to its resting position before the next compression. This full recoil creates the pressure that draws blood back into the heart.
Do not lift your hand off the chest between compressions. Maintain contact and position throughout the 30-compression set.
Maintain a rate of 100 to 120 compressions per minute. This is roughly two compressions per second. Counting aloud helps: "one and two and three and four" up to 30. The beat of Stayin' Alive by the Bee Gees is exactly 100 bpm and widely used as a mental reference.
Compression and release should take equal time. A rhythm of equal push-and-release produces the most effective circulation.
Count to 30, then stop for rescue breaths. After the 30th compression, immediately move to Step 9.
Do
Avoid
Chest Compressions

Steps 7 to 8

Rescue Breaths

Give 2 Rescue Breaths

After every 30 compressions, give 2 rescue breaths. Move quickly. Minimising the gap between compressions and breaths is important — aim to be back on the chest within 5 seconds.
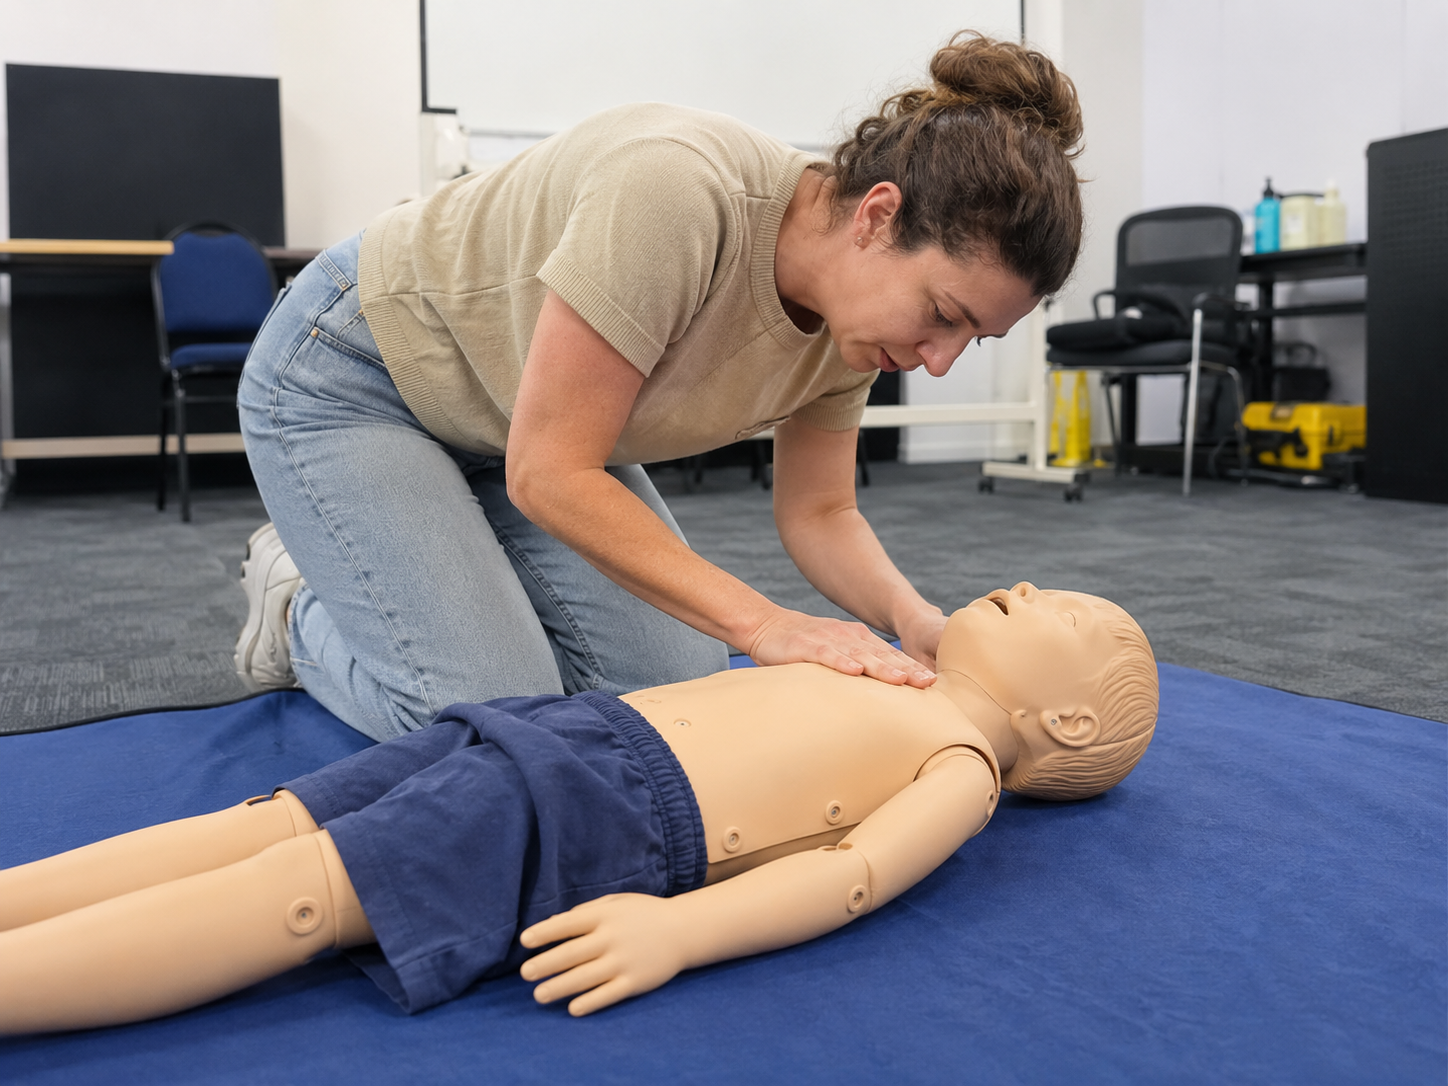
Move back to the airway position immediately after the 30th compression. Reposition at the child's head.
Re-establish the slight head tilt and chin lift. Don't assume it's still in position. Actively reset it: one hand on the forehead, two fingertips under the chin.
Pinch the nose shut with the thumb and index finger of the hand on the forehead.
Seal your mouth over the child's mouth completely with no gaps.
Give the first breath steadily over 1 second. Watch the chest rise. If it rises, the breath has entered the lungs. If not, recheck head position and seal.
Remove your mouth and allow the chest to fall completely.
Give the first breath steadily over 1 second. Watch the chest rise. If it rises, the breath has entered the lungs. If not, recheck head position and seal.
Child & Kids CPR
Do not skip rescue breaths. Unlike adult CPR where compression-only is acceptable, children arrest from oxygen loss. Without rescue breaths, you are circulating oxygen-depleted blood. Breaths must be included every cycle.
Continuing CPR

Step 10 — repeat until help arrives

Administer Compressions & Breaths

Continue the 30:2 Cycle Without Stopping

Steps 8 and 9 — 30 compressions followed by 2 rescue breaths — repeat continuously. This is the cycle you maintain until something changes. Do not stop to check between cycles.
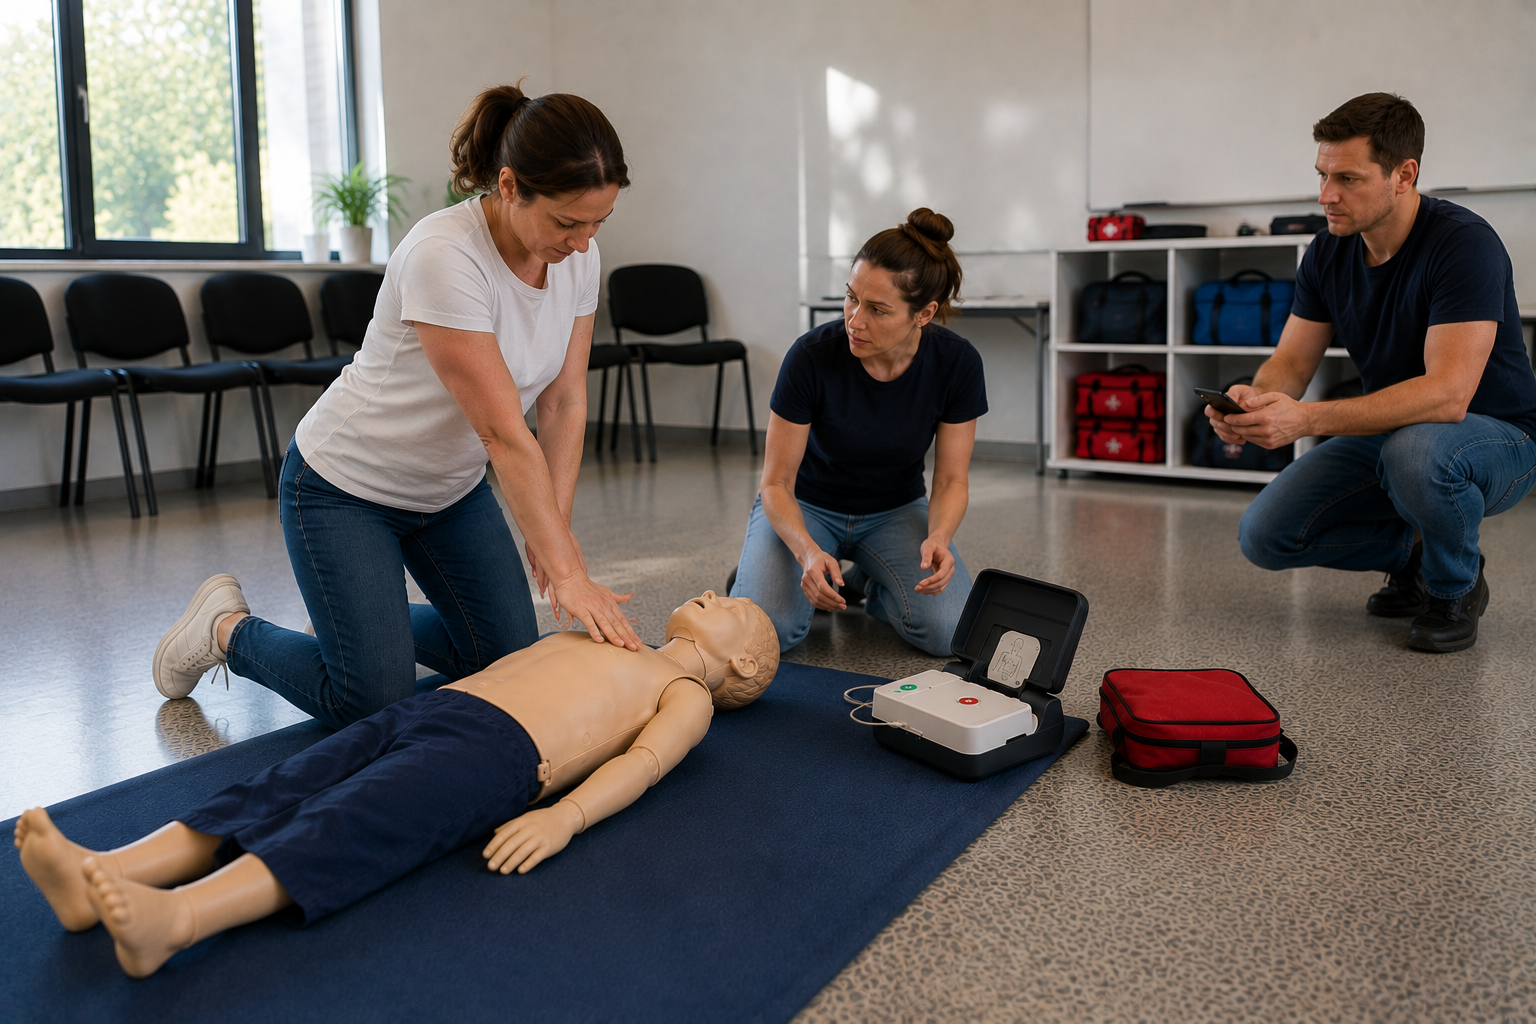
One cycle = 30 compressions + 2 breaths. Repeat this cycle back to back with no pauses other than for the breaths themselves.
Do not stop to check for breathing or a pulse between cycles. Interruptions drop coronary perfusion pressure immediately. Every second off the chest reduces the chance of survival. Only stop if the child shows clear signs of life: normal breathing, purposeful movement, or coughing.
If a second trained rescuer is available, swap roles every 2 minutes (roughly every 5 cycles). CPR is physically demanding and quality drops quickly with fatigue. Coordinate the swap during the rescue breaths to minimise downtime on the chest.
Keep going until one of these happens: the child begins breathing normally on their own; trained emergency services arrive and take over; you are physically unable to continue; or a medical professional tells you to stop.
If the child recovers and starts breathing and moving, place them in the recovery position: on their side with the lower arm forward, top knee bent forward as a brace, and head tilted back slightly to keep the airway open. Monitor until the ambulance arrives.
Learn how to do CPR on a child
Continuing CPR

Step 10 — repeat until help arrives

Apply An AED

Defibrillator

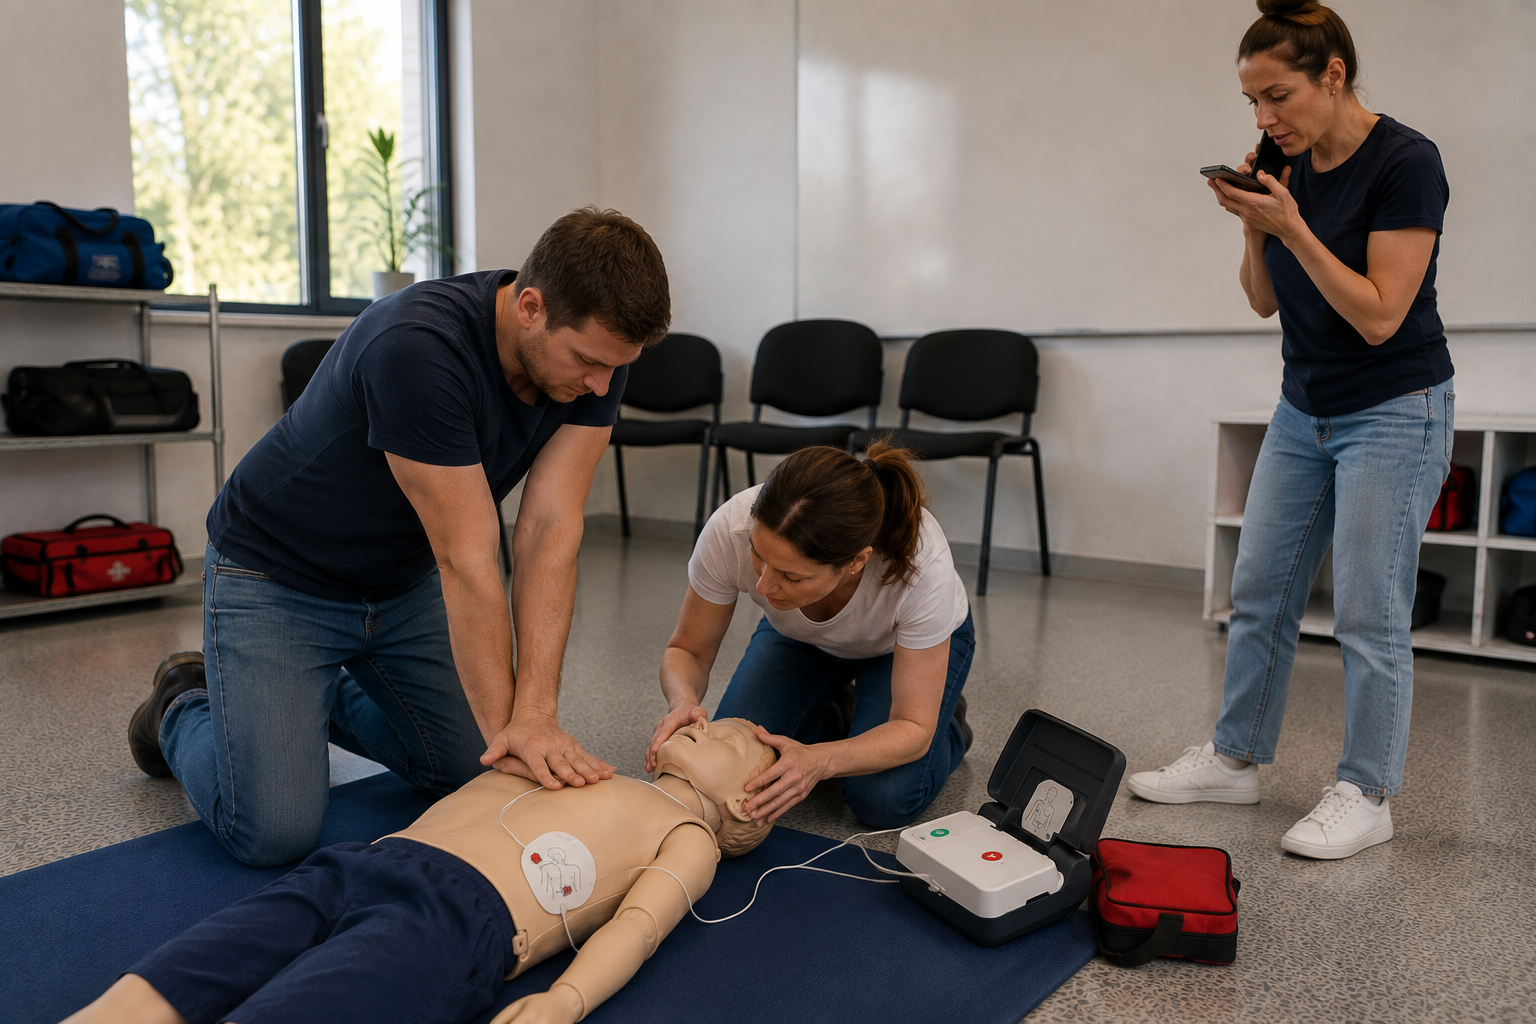
If an AED (Automated External Defibrillator) becomes available at any point – before or during CPR -use it immediately. AEDs are designed to be used by anyone. They analyse the heart’s rhythm and deliver a shock only when one is needed.

Power On

Open the case and switch it on. Follow the voice prompts throughout.

Attach Pads

Paediatric pads preferred under 8 years. Upper right chest and lower left side. If pads may overlap, place one front, one back.

Clear & Analyse

Tell everyone to stand clear. The AED analyses the rhythm and advises whether a shock is needed.

Resume CPR

After any shock, or if no shock is advised, resume 30:2 CPR immediately and continue until EMS arrives.
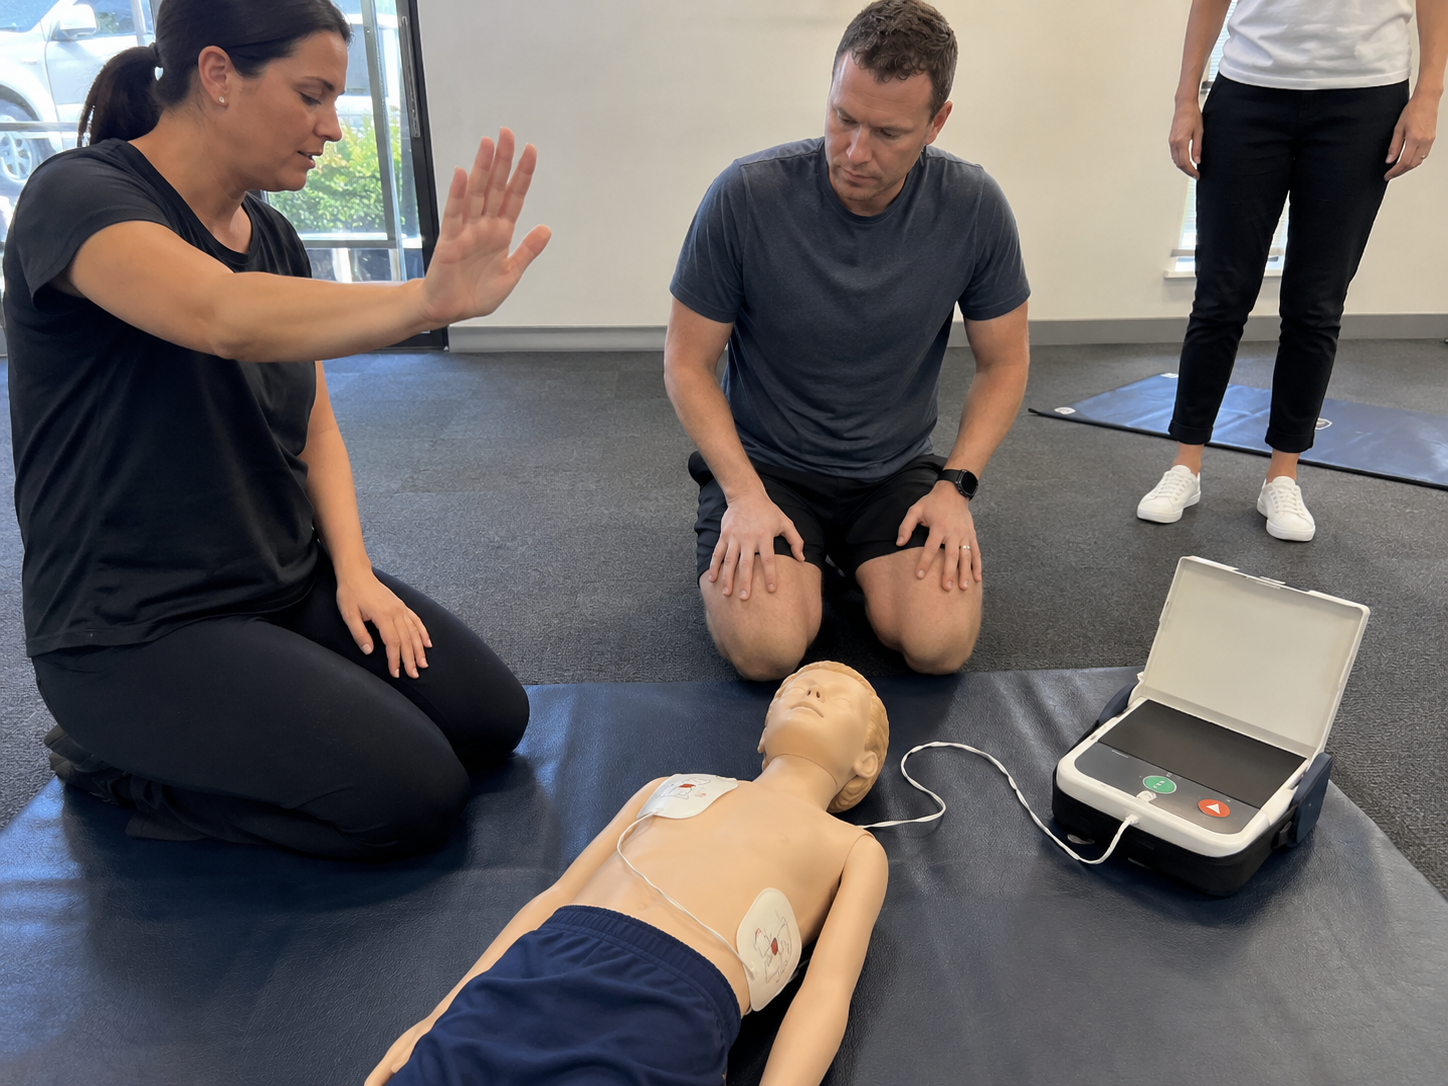
Send someone to find an AED as soon as you begin CPR. Public AEDs are found in shopping centres, gyms, airports, schools, and many workplaces. The 000 operator can often direct the caller to the nearest one.
Do not interrupt CPR to go looking for an AED yourself if you are alone. Maintain CPR and let a bystander retrieve it.
Paediatric pads are preferred for children under 8 years. If paediatric pads are not available, adult pads are safe to use. Do not delay or avoid the AED because of pad type.
If the pads risk overlapping on a small child, place one pad in the centre of the chest and one in the centre of the back instead of the standard placement.
After the AED delivers a shock, or if it advises no shock, return to 30:2 CPR immediately. Do not stop to check the child. Continue until trained help arrives.
Applying an AED to a child
No paediatric pads? Use adult pads. An AED with adult pads is always safer than no defibrillation at all. Do not skip this step.

Reading the steps is a start.
Practising CPR for Kids is what counts.

Reading a kids CPR guide is a great first step, but hands-on training with corrective feedback alongside an experienced trainer helps build the confidence and muscle memory needed to respond under pressure. Book a course to practise child CPR on a manikin and put your CPR kids knowledge into action!

North Hobart